Sprinklersystem installation and maintenance
- Support
- Planning & Advice
- Watering system
- Sprinklersystem
- Installation & maintenance

You have got a GARDENA Sprinklersystem at home and need to install it? Or wonder how to maintain it in the best way? Our how-to-video and our collection of tips and tricks is there to support you.
There are only a few more things you need to do before you can sit back and relax whilst irrigation takes place. Here are a few easy steps to allow you to professionally install your sprinkler system.*

Lay out all the parts in your garden in accordance with the plan. When doing so, start at the beginning of your watering system.
Tip: Unwinding the pipelines one to two hours beforehand and laying them out in the sun makes them easy to straighten.

Cut the pipes to the correct length in accordance with the plan. Make sure that no soil enters the pipeline. If necessary, deburr the pipe, i.e. remove any dirty cut edges.

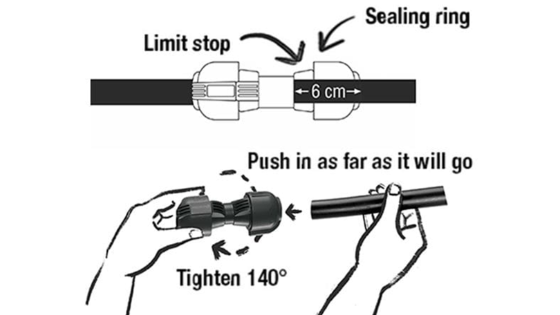
Now connect the elements. Push the pipes approx. 6 cm into the connecting part over the O-ring, creating a water-tight connection.
Caution: a sealing ring is positioned after approx. 4 cm. At this point, push the pipe further into the hole.

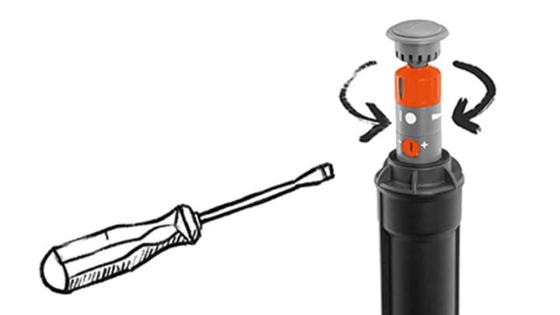
Now adjust the spray direction, the sectors and the reach on the sprinkler. Simply use a screwdriver to turn the upper screw. This will allow you to regulate the range.

Important! Now check that your sprinkler system is watertight.
To check this, carry out a test run before you lay the system underground. If the sprinkler system is watertight, continue to Step 6. If it is not watertight, check to see if the pipes are actually placed as far as they will go into the coupler.

Use a spade to cut out a v-shaped pipe trench approx. 20-25 cm deep. When doing so, carefully remove the turf that you have dug out and dig out the trench. Remove any stones from the trench.
Tip: Mow the lawn and water it beforehand. This will make the process easier.

Lay lines with sprinklers and components connected in the trench. All sprinklers, connecting points, and water connectors must be installed flush with the ground surface. The head including recessed grip should be above the ground for regular cleaning.

The drain valves are installed at the lowest points of the system. On slopes, the height difference between the drain valves must not exceed 2 m. Install several drain valves on slopes if necessary. To improve drainage and to protect the drain valve underlay it with a seeping water drain packing (washed, coarse gravel, approx. 20 × 20 × 20 cm). Before fitting the drain valves, flush the system to remove any contamination that may have entered the system during installation. The drain valves automatically open after watering, as soon as the water pressure is less than 0.2 bar, and drain the line.

Now replace the soil, lay the turf on the soil and tread down. Everything will grow back faster if you water the soil and turf beforehand. After two to three weeks, you will not be able to see the system any more.
Here are some tips that will help you prolong the life of your system.

The sprinklers and pipes are approved for an operating pressure of up to 6 bar. If the water pressure is higher, a pressure reduction unit must be fitted. For questions regarding correct connection to the domestic water supply network, please ask your local sanitary works specialist.

If water is supplied to the irrigation system via a pump, sand may enter the pipeline system and causes your sprinkler to malfunction. Therefore, always use a central filter if the water is supplied via a pump.

Did you install your GARDENA Sprinklersystem before 2005 and now want to extend or upgrade it?
For changing from the 19 mm connecting pipe to the 25 mm pipe, use the Adapter Piece Item. no. 1513 combined with the Connector 25 mm × 1" male thread Item. no. 2763.
For changing from the 32 mm connecting pipe to the 25mm pipe, use the Reduction Connector Art. no 2777.

Disconnect your irrigation system from the supply line before the first frost sets in. Observe the notes on frost protection for the individual products.

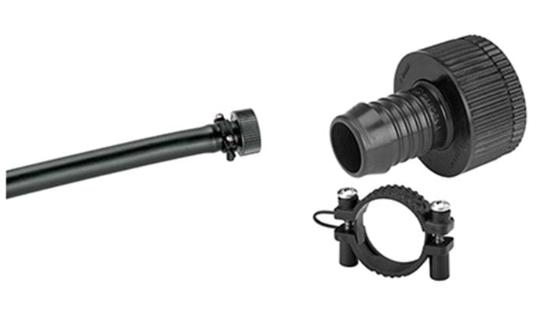
To guarantee a continuous pressure-resistant connection, the tap and connecting point (2722) should be connected using a ¾" hose and two adapter pieces (1513).

Secateurs to cut pipes, screwdrivers (flat-tip or Phillips-head) to adjust the sprinkler, spades to bury pipes.

The V3 valve box is connected to the water supply. You can also combine it with a V1 valve box. To do so, branch off a connecting pipe and connect it to the V1 valve box.
Tip: If you want to install more than one valve box next to each other, we recommend screwing the valve boxes to a wooden board, thus fixing them into place.

V3 valve boxes can be very easily combined with each other, assembled and disassembled. The telescopic screw connection ensures this can be done.
View how to install the valve box and how to install the irrigation valve.
* If you want to install the system yourself, please be aware that we cannot accept any liability for any costs and damage that could occur as a result.
